Autopsy
Autopsy is another great program by Brian Carrier that provides a nice html based front end to the Sleuthkit. In addition to allowing you easy access to the functions provided by the Sleuthkit tools, Autopsy providesa vehicle for organizing your cases and the images and hosts associated with those cases. Download Autopsy at the Sleuthkit website.
We begin by installing Autopsy (version 1.75 will be used with Sleuthkit 1.66). As with all software, you should read the included documentation thoroughly before you get started. The documents included in the Autopsy (and Sleuthkit, for that matter) are well written and explain everything you need to know. Some of the high points to take note of before beginning theinstallation process:
- We have to create an “Evidence Locker” for Autopsy to store generated results. Do this with themkdircommand in a suitable directory with enough space:
mkdir /root/autopsy_evid/
Know the path to your Sleuthkit directory. You have to enter it during the Autopsy install.
You can also use a hash database for data reduction purposes (known good files and/or known bad files). While we are not going to use such a database here, beaware of the capability. Proper use of hash databases can often be a huge time saver.
Begin the installation by untarring the_autopsy-1.75.tar.gz_archive in the root directory with.
tar xzvf autopsy-1.75.tar.gz
Change into the resultingautopsy-__1.75_directory and typemake. The program will search for several files, and then prompt you for the location of your Sleuthkit install. Enter the path. When you are asked about the location of your NSRL database, just hit enter (unless you installed it). Finally, enter the path of our Evidence Locker (/root/autopsyevid).
All we need to do is start the Autopsy process. Obviously, we will need to be in the X Window environment to use the tool. In a terminal window, enter:
./autopsy
Once the Autopsy process starts, you will want to open your browser and copy the resulting URL into your browser window.
=========================================
Autopsy Forensic Browser
http://www.sleuth_kit.org/autopsy/_ ver 1.75
=========================================
Evidence Locker: /root/autopsy_evid/
Start Time: Sun Aug 17 16:13:56 2003
Remote Host: localhost
Local Port: 9999
Open an HTML browser on the re__mote host and paste this URL in it:
http://localhost:9999/30982529072506971042/autopsy
Keep this process running and use
Illegal HTML tag removed : to exit
Be careful not to close the terminal window. The Autopsy process starts as a “child” of the terminal in which it is started. If the terminal window is killed, so is Autopsy.
Copying the URL shown above (yours might differ) and pasting it into your browser results in the Autopsy HTML interface being displayed. Take note of the “Help” button in the lower right. The HTML help pages are detailed and extremely useful if you get stuck or curious:
Figure 1. Autopsy opening screen
Click on “New Case” and fill in the required information:
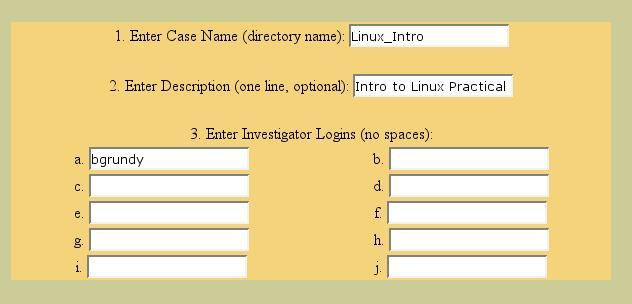
Figure 2. Entering new case information
Click on “New Case” again, and then read the information that Autopsy provides on the steps it has taken (creating new directories, etc.).
You are then taken to the “Case Gallery”. When you have more than one case started, they will all be displayed here. As you start Autopsy, you will select the case with the corresponding radio button and then click “ok” to go to that case.
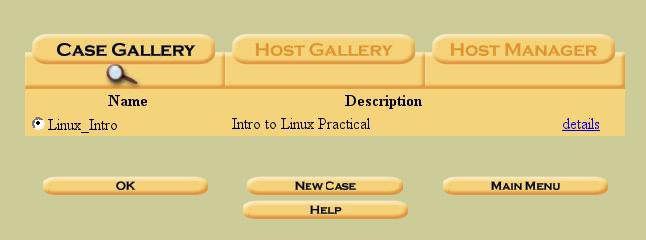
Figure 3. The "Case Gallery"
After entering the case that we just created, we are presented with a screen that tells us that we need to add a “host” in the “Host Gallery”. The case name is displayed in the top left hand corner:
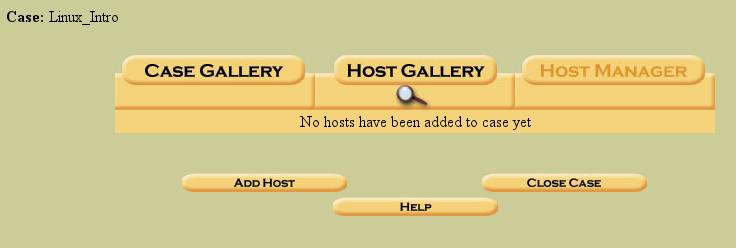
Figure 4. An empty "Host Gallery"
At this point, we need to provide a little explanation that might be obvious to some, but not to those of you who do not commonly handle network intrusion cases. The term “host” refers to any computer, identified by name or IP address, connected to the network (local or wide area). A host computer can be either a victim or a “hostile”. Both require forensic examination in most cases. Details on network intrusion investigations are outside the scope of this document.
Enter the “Add Host” section and fill in the required information:
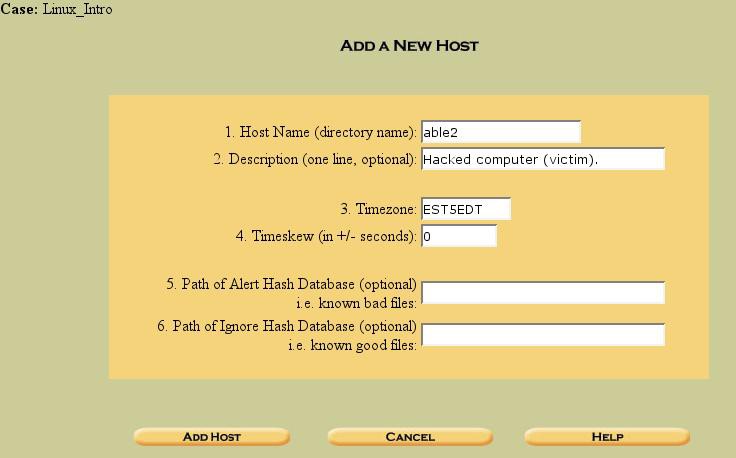
Figure 5. Adding a new host
The information we provide above includes the Host Name (name or IP of the computer), which will be used to name the directory in our evidence locker, a description, the time zone of the computer, and the time skew.
The available time zones can be found in your_/usr/share/zoneinfo_directory. In this case, I used EST5EDT (Eastern Standard Time, 5 hours from GMT, Eastern Daylight Time). The timeskew describes the number of seconds the host’s clock was off from a standard clock. This is important for reconciling log entries and file times.
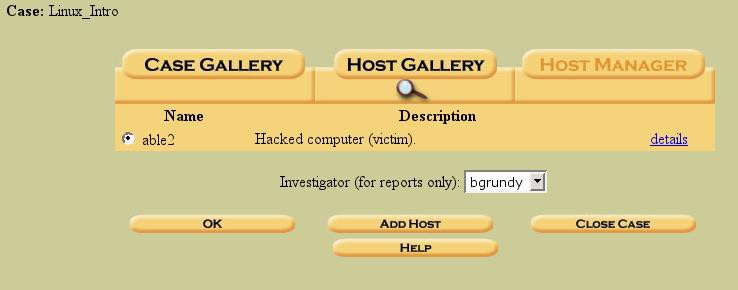
Figure 6. A single host entered in the "Host Gallery"
Now that we have the case defined, anda host within that case defined, we need to tell the host about the different forensic images that make up our evidence gathered fromable2. Click “ok” (above) to enter theable2“Host Manger” area. Again, if there were multiple hosts defined for this case, we would select the host we want to manage with the appropriate radio button.
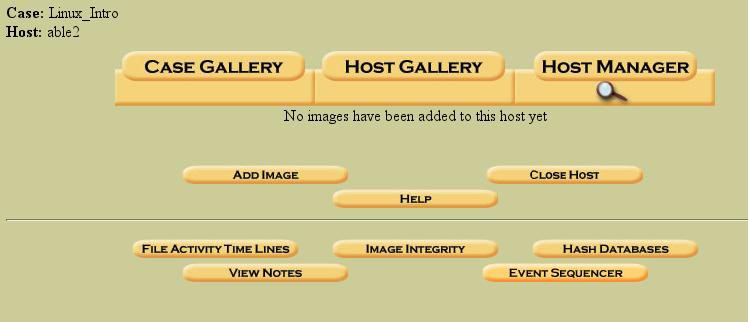
Figure 7. The "Host Manager" prior to adding forensic images
We are now in the Host Manager (above). Notice that “No images have been added” is telling us that there is not yet any evidence associated with this host. We need to add the appropriate images, so click on “Add Image”.
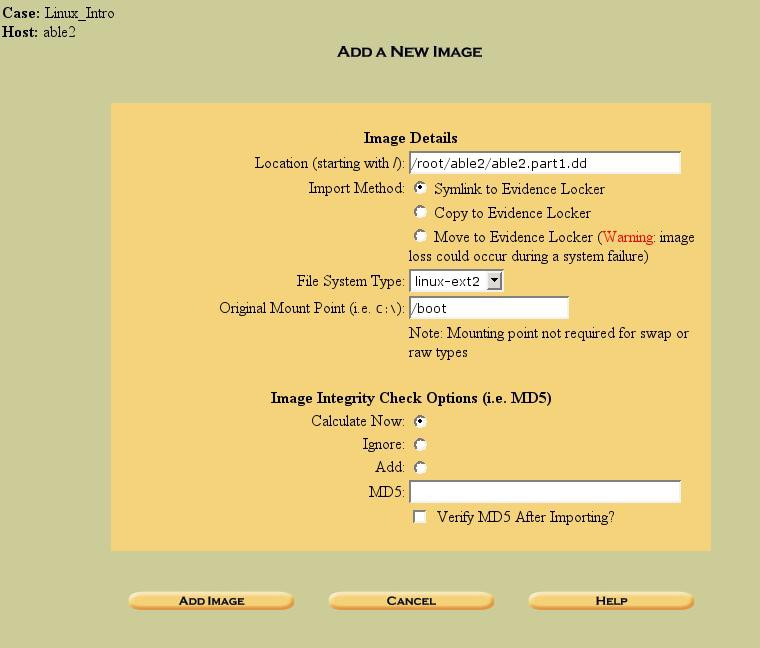
Figure 8. Adding the partition images to the "Host Manager" for our host
Much of the information we need to input in the dialog box shown above was calculated earlier in our exercises. We already mentioned that Sleuthkit (and therefore Autopsy) works (for now) on partition images, not on disk images. Earlier, we calculated the sizes and locations of the partitions and carved them out of the original_able2.dd_image. It is these images that we will use in this case.
Autopsy gives you the choiceof “linking” (creating a shortcut) from the original location of the partition image, copying the image, or moving the image to the evidence locker (/root/autopsy_evid/…). I prefer to symlink the image. Do whichever you prefer, but make sure you have enough room.
In most of our Sleuthkit commands from the previous exercise, we had to specify the file system type with a command option (-f linux-ext2). In the above dialog box, we specify it in a dropdown box. Any operation taken on that image will apply that file system type.
Finally, we fill in the “Original Mount Point”. Again, we found this out earlier in our exercises by accessing the_/etc/fstab_file from the_able2.part2.dd_image. In much the same way that we did it manually earlier11, Autopsyis using the information we are providing to rebuild the original file system from the_able2_host.
| able2.part1.dd /bootext2 | /dev/hda1 |
|---|---|
| able2.part2.dd / ext2 | /dev/hda2 |
| able2.part4.dd /usr ext2 | /dev/hda4 |
| able2.part3.dd swapSwap | /dev/hda3 |
We need to go through the “Add Image” process once for each partition image that we carved from the originalable2.dd. Note that for the file system type forable2.part3.dd(the swap partition), you can just putnone. When you are finished, the Host Manager page should look like this:
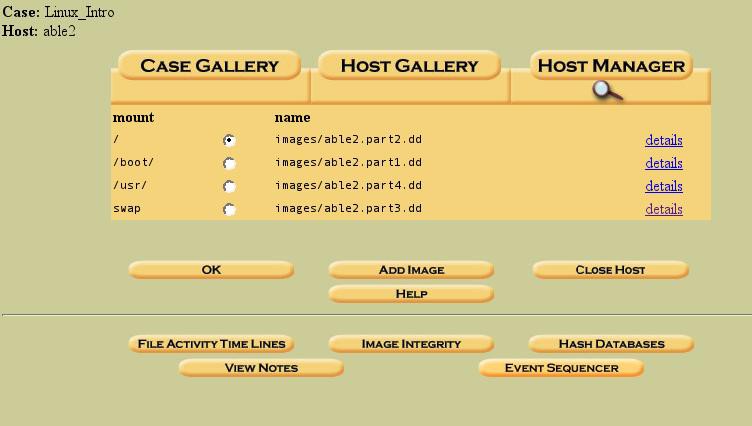
Figure 9. Completed "Host Manager" for our host,able2
The image above shows the completed Host Manager entries for our case. We are now ready to explore Autopsy, and the powerful forensic capabilities it gives us.
In addition to giving us a “point and click” environment for accessing the commands available with the Sleuthkit, Autopsy has also done a good job of organizing our case based on the information we filled in.
/root (root user’s home directory)
| autopsy_evid our evidence locker | Linux_Intro our case name
|_able2our first host
|_images |_logs |_mnt
|_output
|_reports
|_host 2if we add another computer
|_host3
|_Second Case
|_host …etc.
Most of the exploration of this powerful software package I will leave up to the reader. This is a beginner’s document, aimed only at getting you started. We will go through a couple of steps, and leave the rest to your curiosity…
Let’s have a look at some of the commands and steps we took using the Sleuthkit’s command line tools on this same evidence, this time using Autopsy.
First, in the Host Manager make sure the radio button forable2.part2.dd(the “/” partition) is selected, and click “okay”. In the resulting page, there is a frame at the top with a row of buttons for various functions. Click on the button “Image Details” and look at the output. Does it look familiar?
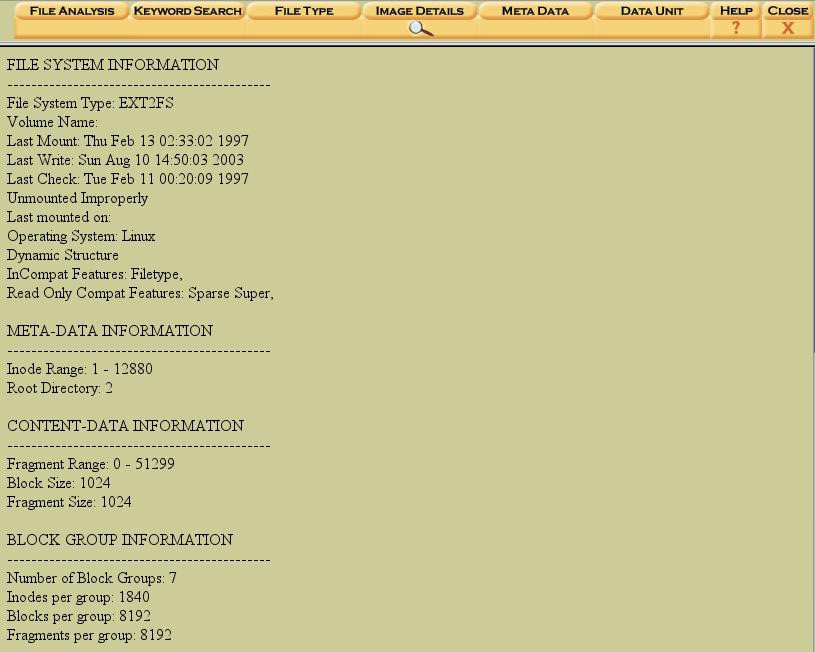
Figure 10. "Image Details" provides similar output to "fsstat"
This is the same output we saw from ourfsstatcommand from the Sleuthkit! Let’s go a little deeper and see if we can reproduce moreof our Sleuthkit output.
In the top frame row of buttons, click “File Analysis” (we are still in theable2.part2.dd_image, the “/” file system of_able2). We are now given a “tree” view of the contents of the selected image.
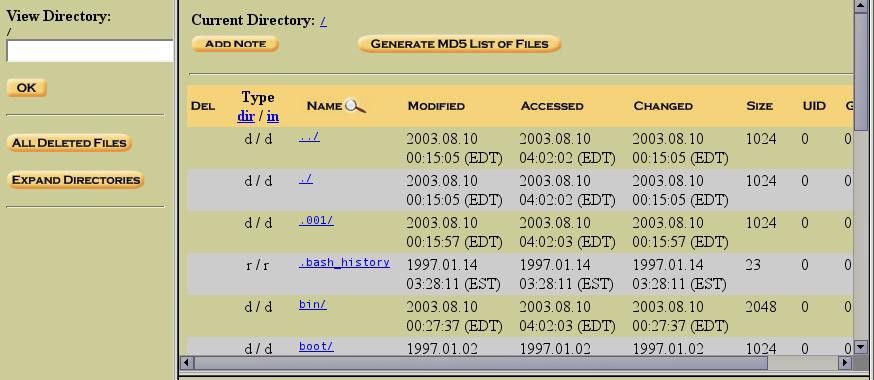
Figure 11. "File Analysis" display
In the left hand pane, there is a button labeled “All Deleted Files”.
Click on this button…
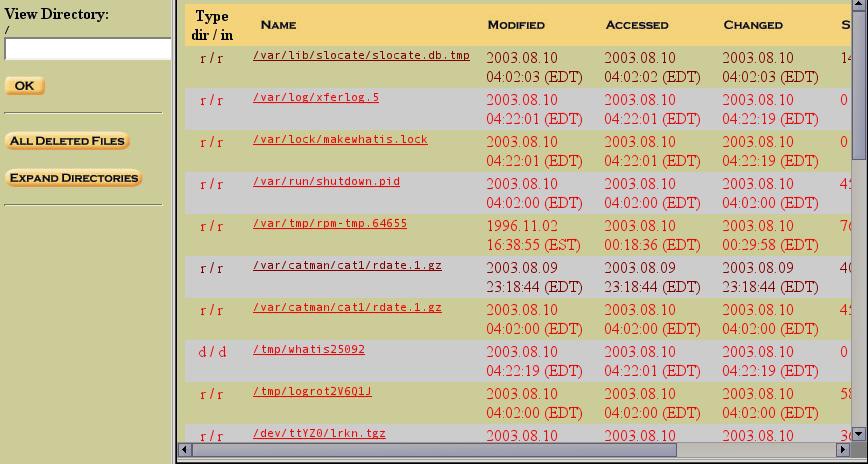
Figure 12. "All Deleted Files" provides similar output to fls**
This generates a list of all the deleted files found on this partition. Again, do you recognize the output? It provides similar output to ourflscommand from the Sleuthkit. Scroll to the bottom of the list, and you will see our/root/lrkn.tgz,_recovered by the Sleuthkit from inode 2139. Once you scroll to the bottom of the list and see/root/lrkn.tgz_, you can scroll all the way to the right and see that the file is indeed associated with inode 2139.
If you click ON THE INODE NUMBER (2139), you will see the following:
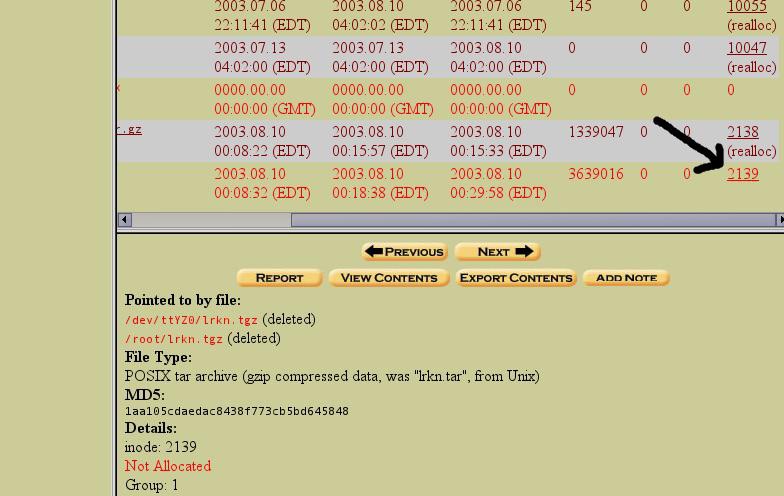
Figure 13. Click ON THE INODE number (all the way to the right, see the arrow)
Again, you see the output is similar to out output from the Sleuthkit commandistat(under “Details:”). Clicking on “Export Contents” produces a dialog box that allows us to save the file to our local file system. If you retrace the same process we followed with the previous exported contents of inode 2139 using Sleuthkit12, you will find the same results.
This is as far as we will go withSleuthkit/Autopsy in this beginner environment. Hopefully you will continue to explore some of the useful features of Autopsy on your own (the timeline feature is especially useful for intrusion investigations).
11. See the sectionDetermining the Subject Disk Filesystem Structureon page 76. ↩
12. See Page 86. ↩